· trailers · 5 min read
Anatomy of a DIY Trailer - Part 3
Part 3 - The Home Stretch. The trailer was about ready to be skinned, doors, installed, kitchen installed, and testing on some local trails prior to the full big trip to Utah. The testing never…
Part 3 - The Home Stretch. The trailer was about ready to be skinned, doors, installed, kitchen installed, and testing on some local trails prior to the full big trip to Utah. The testing never happened. We ending up finishing my trailer at 9pm the day prior to heading to Utah for the border to border run.
I priced aluminum sheet from several vendors. I attempted to get quotes from 3 different vendors (all of which were recommended) for powder coating and possibly bend the sheet in a similar fashion to what Turtleback Trailers does. None of them got back to me. A frustrating but typical process. So I contacted Dave from Turtleback to see if he had any suggestions. He told me he has some extra sheet and could sell it to me for a good price. The sheet was also already powder coated white. White was fine with me and saved the step of trying to find someone to do it. I convinced Dave to help me install the sheet (Remember that thing about convincing friends to help!) This is also where my trailer build took a big fork in the road. I had some extra time on my hands and Dave needed some help around the shop. Long story short while I was helping Dave build his production trailers he kept telling me I should do this and that and not do this or that to my trailer. I ended up listening to him and while I spent more money than I planned on in Phase 1 I ended up with a phenomenal trailer.
Original ideas and lessons learned:
- Door frames made out of 1’ square steel with piano hinges. Dave said the doors would be too heavy. Also the open areas for the doors weren’t 100% square. This led to buying doors in frames! like what the Turtleback trailers have. So if you decide to build a trailer make frames for your doors and then install them. Just like in a house this allows you to shim as required.
- I don’t want an electrical system or water in phase 1. Dave said this is a bad idea since it will be difficult to to install at a later date with the sides and top on. Damn you Dave! We elected to install a basic electrical system based on his designs and a 33 gallon water tank that I had already purchased. Well if you do electrical you might as well do plumbing as well. This ended up requiring another modification to the trailer. Get rid of the interior storage areas with doors and add exterior boxes instead.
- You should really have a kitchen like the Turtleback trailer. Oh brother… this one I tried to put my foot down on and failed.
- I ended up paying a local fabrication company to make custom doors for the trailer. In the end that was worth it. Poor quality doors or poor fit would have really diminished the quality of this build.
For those that haven’t seen my trailer here is the reveal. In some ways it looks very similar to a Turtleback. This is because I have the same doors, kitchen, shower, tank fill, lights, basic electrical system, battery and bottle opener! Where mine differs is it is a larger trailer with more interior storage. The box is both longer, 2” shorter, and 2” skinnier. I also have a more basic tongue box which only holds a single battery and not the core electrical system.
There were plenty of mistakes along the way. Purchased and installed the wrong style of drawer slides, built door frames which wouldn’t work, didn’t properly plan the roof rack, and countless other minor goofs. I still have an amazing trailer and each and every time I use it I enjoy it more and more. The chair-throwing was because I scratched one of my new pretty doors by screwing up the handle installation. That poor innocent chair. I had owned it since a freshman in college. It served me well and didn’t deserve its destruction. Long live the chair! Thankfully its brother survived.
I cannot thank Eric Rogers, Don Grey, Patric Denonville, Rob from PMA 4x4, Dave Munsterman, Kevin Clark and probably 10 other people I am forgetting that allowed me to “Build my own trailer.” If you don’t want to take the journey of building your own I highly recommend taking a look at what Turtleback has to offer.
and now for the reveal!
 Front door, shower, tank fill, on demand water heater, PMA 4x4 11lb propane tank holder and Toyota rims.
 Electrical system and pull out kitchen with sink. Along with the switches for the h2o pump and light there is a dual USB port and 12 volt socket.
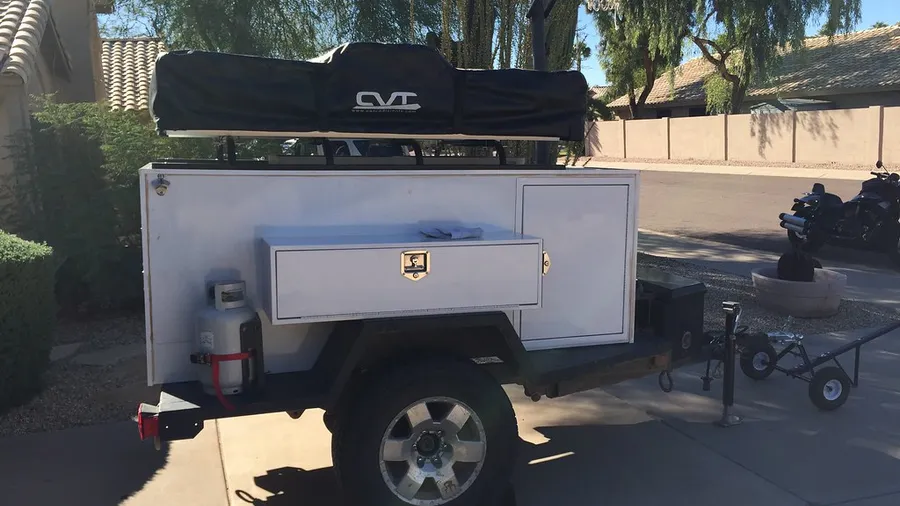
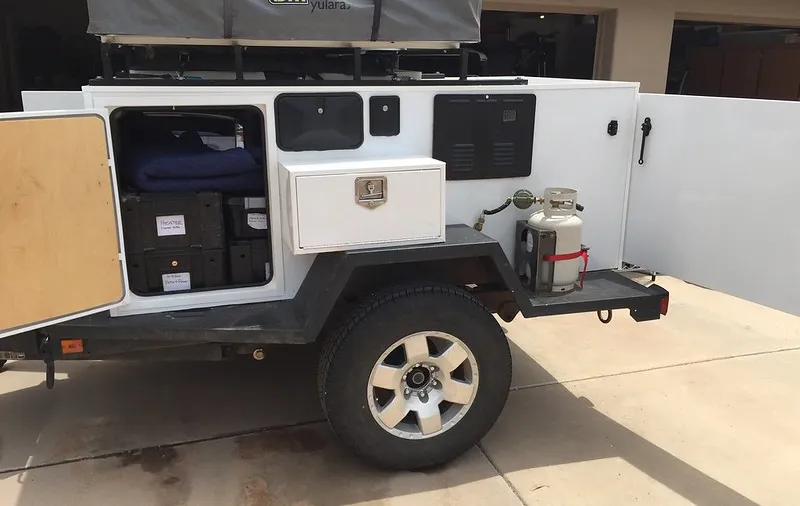
 Dual fuel can holders and tongue box.
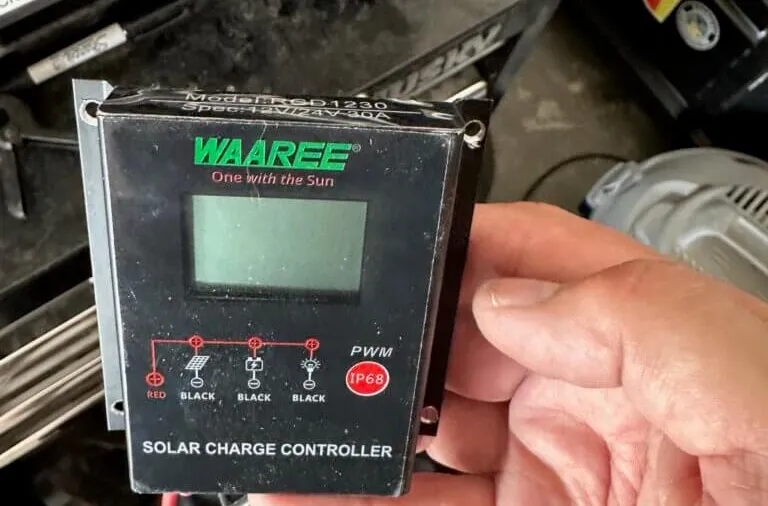
 Simple but well thought out electrical system. BlueSea fuseblock, Solar controller, positive and negative buss and on/off switch
 Shore power for the onboard AGM battery
 Solar panel connector with an SAE connector plug. Official name SAE RV Roof Connector. Found on eBay. I own a rollable PowerFilm 60 watt panel.
Planned Phase 2 Improvements:
- Rebuild the kitchen cabinet with the current kitchen in mind. The original build was never meant to have a drop in kitchen. I already have laminate for the cabinet to give it a cleaner look. Also install improved drawer slides.
- Build a new roof rack which will allow for a bigger tent and move the tent towards the back. I also want a way to store at least one fold up table.
- Install flat LED tail lights
- Possibly build a swing out for a spare tire and a table for my grill
Update: The trailer has been upgraded with a new CVT Mt. Rainier tent purchased from Expedition Inspired.